
The unofficial TWRP Recovery 3.0.2.1 has been made available for Huawei Mate 9 android smartphone. The Recovery comes with plethora features and can be used to root your Huawei Mate 9 device once downloaded. TWRP Recovery is one of the best project powered by team win and it has proved to be more feature packed than other recoveries. It is a custom recovery for android devices which allows you to back up and restore your data, flash custom ROMs to your device, repair broken file systems, and root your device
If you’ve recently bought a Huawei Mate 9 device and eagerly searching for where to install TWRP Recovery and Root your Huawei, then you’re at the right place. Recently a developer from XDA forum (Tkkg1994) has successfully ported the TWRP Recovery and it has been tested and working great on MHA-L29 international dual sim model. So It will work fine on all mate 9 devices. However there are some list of supported device that the TWRP Recovery is compatible with. Below are the supported device….
Supported Device
- MHA-L29XXX devices
- MHA-L09XXX devices
- MHA-AL00XXX devices
- MHA-TL01XXX devices
If your device isn’t listed, then you can try it out on your own risk. But I recommend you wait patiently till your device becomes supported in other to avoid bricking.
Features
- Latest stock kernel included
- f2fs file system support (read, write, format, backup & restore)
- exFAT file system support (read, write, format, backup & restore)
- Full SELinux support
- Built in android 6.0 tree
Known Issues
- Encryption is not supported yet!
- MTP/OTG doesn’t work yet
- Aroma is broken, seems on all other huawei phones (as mate 8 and p9) as well.
Precautions
- Make sure your battery is fully charged before following this procedure.
- Backup your important data for it might erase it .
- Make sure your Huawei Mate 9 Boot loader is unlocked (Google how to unlock Huawei Mate 9 boot loader)
- Your warranty will be void so make sure to contact your carrier if your phone is still under warranty after unlocking the bootloader.
- Follow the steps correctly to successfully install TWRP Recovery on your Huawei Mate 9.
- Note: Tech viola will not be held responsible for any brick you encounter on your device while following this procedure.
Requirements
- Download minimal ADB and fastboot driver and install on your PC.
- Download TWRP Recovery 3.0.2.1for Huawei Mate 9.
- Download latest official version of r275 SuperSU.zip copy it to your phone SD card.
Procedure To Install TWRP Recovery & Root Huawei Mate 9
1. First you’ve to enable USB debugging. Simply navigate to Settings -> About Phone and tap build number 7-10 times.
2. After that, you will become a developer. Go to the developer option that has enabled and toggle USB debugging.
3. Make sure you’ve downloaded the TWRP Recovery and have ADB/Fastboot Driver installed. Then open the adb/fastboot application on your pc and go to the directory where your TWRP img file is downloaded.
4. Now open a command window inside that folder/directory. To do that, press “Shift + Right click” on any empty white space inside the folder and then select “Open command window here” from the context menu.
5. Now connect your device to PC and reboot to download mode by typing the command
fastboot reboot-bootloader
Or simply power off your phone, hit power on and volume down until it boots to download mode.
6. Now you should be in fastboot mode. (Check for “Unlocked Phone” written word) and if it’s there, then you’re go to go.
7. Next input the below command correctly in command prompt and then press enter. It will install TWRP recovery on Huawei Mate 9.
flash recovery twrp-3.0.2-1-hi3660.img
8. Now reboot your Huawei Mate 9 by typing the below command
fastboot reboot
9. Now boot into recovery by pressing power+volume up+volume down button at the same time
10. Done! TWRP Recovery has successfully been installed on your Huawei Mate 9.
How To Root Huawei Mate 9
1. Reboot your device to TWRP Recovery by following the instruction above.
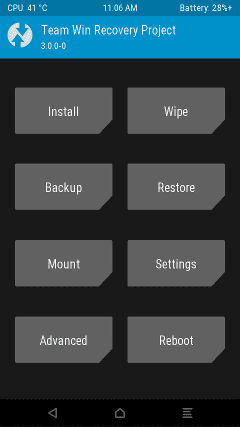
2. Now from the main menu, navigate to Install zip and select the SuperSU.zip you downloaded earlier.
3. Then swipe to install the SuperSU.zip.
4. Congrats! Your Huawei Mate 9 is successfully rooted.
Final words
Guess it’s simple, make sure your Huawei Mate 9 boot loader iis unlocked before following this procedure. If you’ve any question related to this article then comment below